Historic Building Conference 2: Historic Brickwork and Masonry
This is a collection of notes from the Historic Building Conference organised by CPD Essentials and held at the 16th century Shaw House in Newbury, Oxfordshire on 3rd June 2026. I am collecting them here to build a record of my learning, creating a treasure trove of notes that I can refer back to in the future, but also make them available to others.
Kevin Stubbs gave two of the strongest sessions of the day, one on the history and making of brick and one on the problems and repair of brick buildings, plus a walk around the outside of Shaw House. I have kept them together here because they are really one continuous subject, and because the history explains why the pathology happens.
How brick came to Britain and how it was made
A useful chronology to have in your head for dating and describing buildings:
The Romans brought fired ceramics to Britain, but the skill was lost after they left, while it carried on across the Channel. The Saxons recycled Roman brick rather than making new, using salvaged Roman material for dressings around openings. St Albans Abbey is the classic example, reusing brick from the Roman town of Verulamium about half a mile away.
Brickmaking proper revived in Britain in the thirteenth and fourteenth centuries, first on the east side of the country where good building stone was scarce and timber was running short. The expertise came from the Low Countries, just across the water, brought in by wealthy feudal patrons such as bishops and lords. Brick spread quickly because it was far cheaper than stone. Stone has to be quarried, dressed by a mason and then laid, whereas with a decent clay source near the site you simply dig a hole, mould the bricks, and fire them on site, with almost no transport.
Early bricks were large and tile-like, following continental sizes, something like eleven inches by five by under two deep. Some east-coast towns appointed municipal brickmakers, with Kingston upon Hull having one as early as 1321 for its fortifications. By the fifteenth century the rising aristocracy were using brick for statement buildings, Tattershall being one that is visible for miles, while the old guard still preferred stone as the prestige material.
Through the sixteenth and seventeenth centuries brick worked its way down the social scale, into chimneys and then into brick infill panels, or nogging, in timber-framed buildings. A nice diagnostic for telling original infill from later retrofit is the timber. If the brick infill was intended from the start, the edges of the timbers are chamfered to take mortar and give a good joint. If the panel was filled later, the timber edges are flat and the brick just butts up against them, so the seasonal movement of the timber opens a gap for water.
Shaw House sat right in the middle of this story, a merchant who had risen through the ranks using new-fashioned brick with stone dressings and lots of glass to show he could afford the lot.
Later refinements worth knowing for description work.
Rubbed brickwork, where the joints are so tight the eye does not read them, common in fine late seventeenth and eighteenth-century work.
Brick as a fire-resistant material, partly why it took off in towns. Kevin cited a 1731 town fire in which only a few buildings survived, one of them brick-built.
Decorative effects from brick alone, using darker vitrified headers against softer red bricks for patterning and diaper work.
Mathematical tiles in the early nineteenth century, tiles hung on a facade to mimic brick, used to smarten up timber-framed buildings. You only spot them at the edges, and on a smart example in Romsey dated 1804 they even formed the returns so no edges show.
Fire regulation actually shaped brick design, which is a useful dating tool. The 1707 London Building Act banned open projecting eaves because they spread fire, pushing builders towards parapets and brick cornices. A couple of years later, regulations required window frames to be set back into the reveal rather than sitting flush, again to slow fire spread.
By the 1760s and 70s red brick was everywhere and no longer a status symbol, at which point cream and white bricks became the prized look, made from estuarine clays such as those around Beaulieu in Hampshire where the iron had been leached out. The nineteenth century brought mass production, pattern-book design and the railways, so buildings stopped reflecting local materials and started mixing bricks and terracotta from all over. The Arts and Crafts movement was partly a reaction against that.
The making process, and why colour and density vary
The hands-on part was genuinely useful for understanding the material better.
Clay is worked to remove pebbles, then moulded, traditionally with a stock board and a moveable mould sanded so the clay releases. The brick is struck level, turned out, air-dried for five to seven weeks, then fired. Clay shrinks between roughly ten and thirteen per cent, so moulds are made oversize, with further shrinkage on firing. The brick needs to go above about 850 degrees to stabilise. Below that it would turn back to soft clay in water. Overfire it and the silica begins to vitrify and the brick fuses towards a glassy state.
Colour comes down to four things working together, and this is the part worth being able to explain on a survey. The clay source and its iron content, the firing temperature, the kiln atmosphere, and any additives. An oxidising atmosphere with iron present gives orange and red. A reducing, oxygen-starved atmosphere gives darker bricks. A clay with little iron gives cream. London stock bricks got their yellow-green tinge partly from the ammonia of the Thames when it was an open sewer, and you can deliberately make a cream brick by adding chalk and firing in a reducing atmosphere, which kills the iron reaction.
Density tracks the manufacturing method, and it matters because density governs where a brick can safely be used. Hand-moulded bricks are the lightest and most porous. Wire-cut extruded bricks are denser, formed by forcing clay through a die under heavy pressure. Pressed bricks are denser again, and engineering bricks are denser still, nearly non-absorbent and very strong, which is why they went into engineering works and paving setts. Shale-based bricks such as the old Fletton stocks from the Peterborough clays nearly fire themselves because of natural oils in the shale, which made them cheap by the million, but they must not be used below ground because of poor frost and salt resistance.
A small thing I asked Kevin directly was the purpose of the frog, the indentation in a brick. The answer is that it is not a way of using less clay. As the clay was thrown into the mould by hand, the frog mechanically pushed it into the corners to give sharp arrises and a crisp brick, and it carried over into machine manufacture. It is not really there for keying.
Rubbed or rubber bricks are a separate specialist product. The clay is sieved very fine and fired low, around 920 degrees, so it stays soft enough to cut with a wire or a brick axe and rub to a precise shape on a stone. Laid with one to two millimetre joints, this is gauged brickwork, used for fine arches and window heads in Georgian and Victorian work.
A sobering note for repair work. There are very few brickmakers left in this country, many foreign-owned, so matching brick for a repair is genuinely hard. Hampshire alone had around twenty brickmakers listed in 1851 and almost none survive, though a handful of specialist makers still produce handmade brick.
Brickwork pathology and repair
The most directly useful part of the day for survey work.
The central villain is dense cement mortar used for repointing. Cement is hard and impermeable. It traps moisture in the wall, gathers it on the surface, and pushes damp through to the inside. Where the bricks are soft-fired, the only escape route for moisture and dissolved salts becomes the brick face itself, so the brick spalls and decays. Cement also acts as a hard wedge in a flexible, shallow-founded historic wall that wants to move, and the wedge action spalls the brick arrises. Soft, low-fired bricks simply do not stand a chance against it.
Lime mortar is the answer because it is breathable, flexible and soft, accommodates movement so you do not need movement joints, and is sacrificial, weathering in preference to the brick. The principle to hold onto is that the mortar should always be weaker than the brick.
Practical points on getting lime repointing right.
Lime grade. Builders default to NHL 3.5 for everything without thinking. For most brick you would rarely use anything stronger than a weak mix around NHL 2, and you choose the hydraulic grade to suit the situation.
Aggregate. Use well-graded, angular, sharp sand, which binds well. Avoid rounded sea-washed sand, which trowels beautifully but bonds poorly. Single-size aggregate leaves large voids that need more binder, making a hungry mix that shrinks.
Water. The more water in the mix, the more it shrinks, leaving fine cracks that then admit frost and water.
Colour. It should come from the aggregate, not from added pigment, so avoid ready-mixed coloured mortars. Order all the aggregate for a job in one delivery, because sand pits vary from one month to the next.
Raking out. Do it by hand, and the tool shape matters. A wedge-shaped chisel driven into a joint splits the brick at its weakest point. Use a plugging or core-out chisel whose blade is wider than its neck so it cannot jam or wedge. Never use a nine-inch angle grinder, which overruns onto the bricks, widens joints, marks bricks above and below, and wanders into the brick face. Kevin has seen conservation officers prosecute for grinder damage to listed buildings.
On finishes, match the original. He showed double-struck and weather-struck pointing, the use of a jointer run down the centre to throw a shadow line that makes the joint look narrower, and tuck pointing, where the joint is filled with mortar coloured to match the brick and a fine ribbon of white lime putty with silver sand is tucked in to give crisp perfect lines. The smart London houses behind the Number 10 doorstep shots are tuck pointed.
Water paths and how they show up. Open perp joints and weathered bed joints let water sit and travel. If a screwdriver disappears into a perp joint, water can run straight through to the internal plaster, especially with through-headers giving a direct path. Inside this shows as damp patches, salts, peeling decoration and mould, made worse by non-breathable modern paints and vinyl wallpapers. Stick to limewash-based or genuinely breathable paints.
Timber frame with brick infill has a permanent weak point where the static brick panel meets the seasonally moving timber. Plastic strips harden and crack. A better detail is a compressed, impregnated foam strip pushed into the joint with a lime pointing over it, with a little hair added to the mortar to hold it together. Avoid tucking lead flashings in, which just funnel water in.
Biological and incidental attack. Buddleia is astonishingly powerful, with one boundary wall lifted about four inches. Ivy works into joints and opens them, and a seedling oak becomes a structural problem in time. Bare scaffold poles rub burr marks into brick, so they should be capped or padded. Follow-on trades cause avoidable damage, the example being an electrician drilling straight through a rubbed-brick panel for a light fitting.
Maintenance is the cheapest conservation there is. Service the building like a car. Most of Kevin's horror stories came back to blocked gutters, downpipes, hoppers and gullies. A blocked gully between two buildings let water cascade for years, rotting posts and beams and triggering dry rot, with a two hundred thousand pound bill.
Drying out a soaked wall. A tank overflow once cascaded down a gable for three weeks, washing lime out of the joints and soaking a nine-inch wall, which dries at roughly an inch a month, so about nine months in total. The fix was to deep rake out and repoint in lime mortar with porous particulates, in this case crushed chalk, to act like a poultice and draw moisture outward, with cork board and lime-hemp plaster internally to give a stable, breathable, decoratable surface. Redecorated in around ten to eleven weeks, and fine five years later.
Rising damp and injection. Kevin's view was blunt. Most so-called rising damp is splashback or a blocked path, and chemical injection is usually a pointless exercise. Drilled holes left open just funnel splashed water back into the wall. The real fixes are about removing the cause and managing drainage, for example a French drain, taking up a concrete path, or an evaporation strip and a lime repoint.
Structural movement. Historic buildings often have shallow or no footings and lime joints, so they flex and settle until they get comfortable. A leaning medieval building in Blandford had no cracks at all, having simply settled onto a medieval ditch, and the only real consequence was distorted joinery. A fire-damaged wall leaning eleven inches out was simply rotated back to vertical by opening the bottom joints and pushing it back, then re-roofed, and was fine forty-five years on. The lesson is not to over-intervene. That said, genuine faults need proper attention, for example a fractured purlin causing eccentric thrust, a bulging wall, or a crack wider at the top.
Tying and stitching. Crack stitching done with a mastic gun is worthless. Proper repair uses helical ties raked into the bed joints and grout or anchors to tie a structure back together. The same applies to cavity walls, where horizontal cracking at regular intervals up the wall is the signature of rusting wall ties expanding and lifting courses, fixed by drilling out and replacing with a resin tie system.
Cleaning, where gentle wins every time. High-pressure water removes the fired skin from the brick face and can over-saturate a wall. Acid cleaning, popular in the 1980s and 90s, damages the fireskin. Sandblasting wrecks the surface, leaving one fine building looking like orange peel. Controlled, low-pressure air-abrasive systems are the gentle option. For paint removal, never use a blowtorch, because of fire risk and toxic fumes from lead paint, and use a high-temperature steam system instead.
Salts and efflorescence. Efflorescence is soluble salts in the clay coming to the surface, usually washing out within three or four years, though some imported bricks can effloresce for twenty. De-icing salt is a recurring culprit. Where lime mortar is working correctly, the salts come out through the joints rather than disrupting the brick faces, which is exactly the behaviour you want.
The first question before any repointing is whether the wall actually needs it. Soft mortar is not in itself a reason to repoint. And before replacing any brick, ask whether it is only aesthetic and causing no actual problem, in which case leave it alone. Kevin pointed to two Historic England reference volumes, one on brick and terracotta and one on mortars, renders and plasters, both within the Practical Building Conservation series.
The exterior tour and the masonry bee evidence
The key technical takeaway from the walk around the outside of Shaw House was the evidence of masonry bee activity in the brickwork, which Kevin pointed out on the elevations. It ties directly into everything above about soft brick and lime mortar.
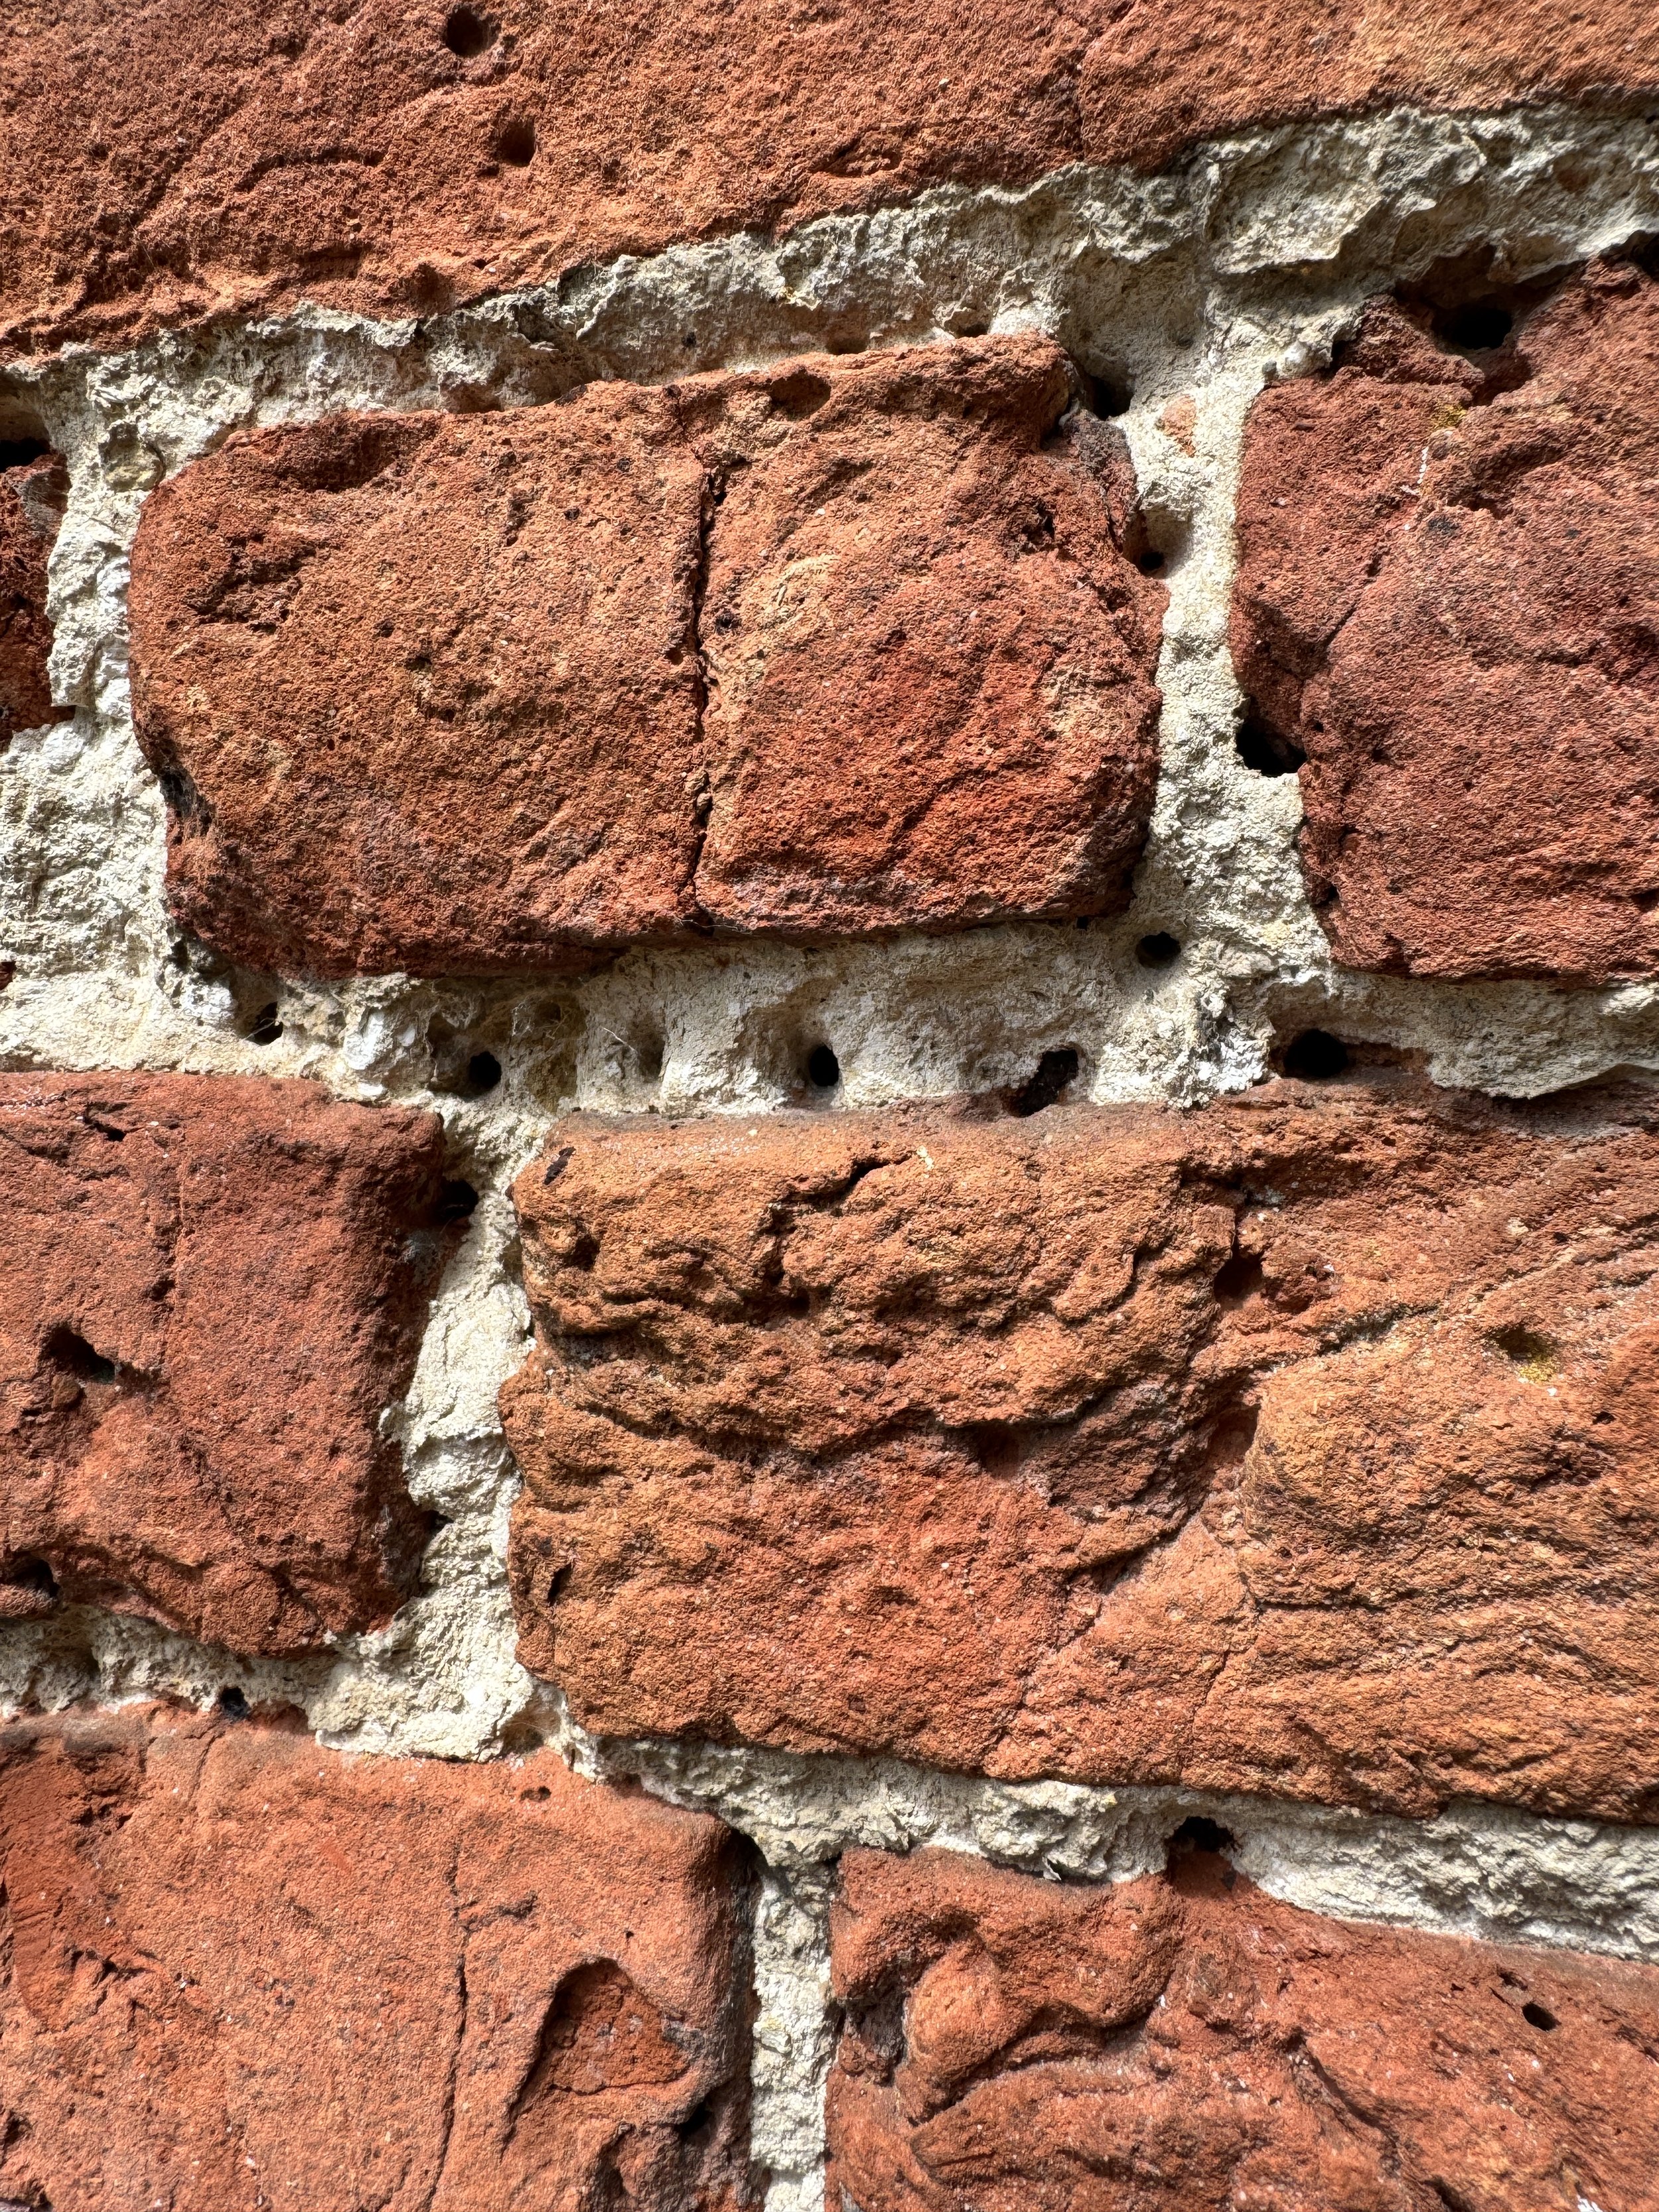
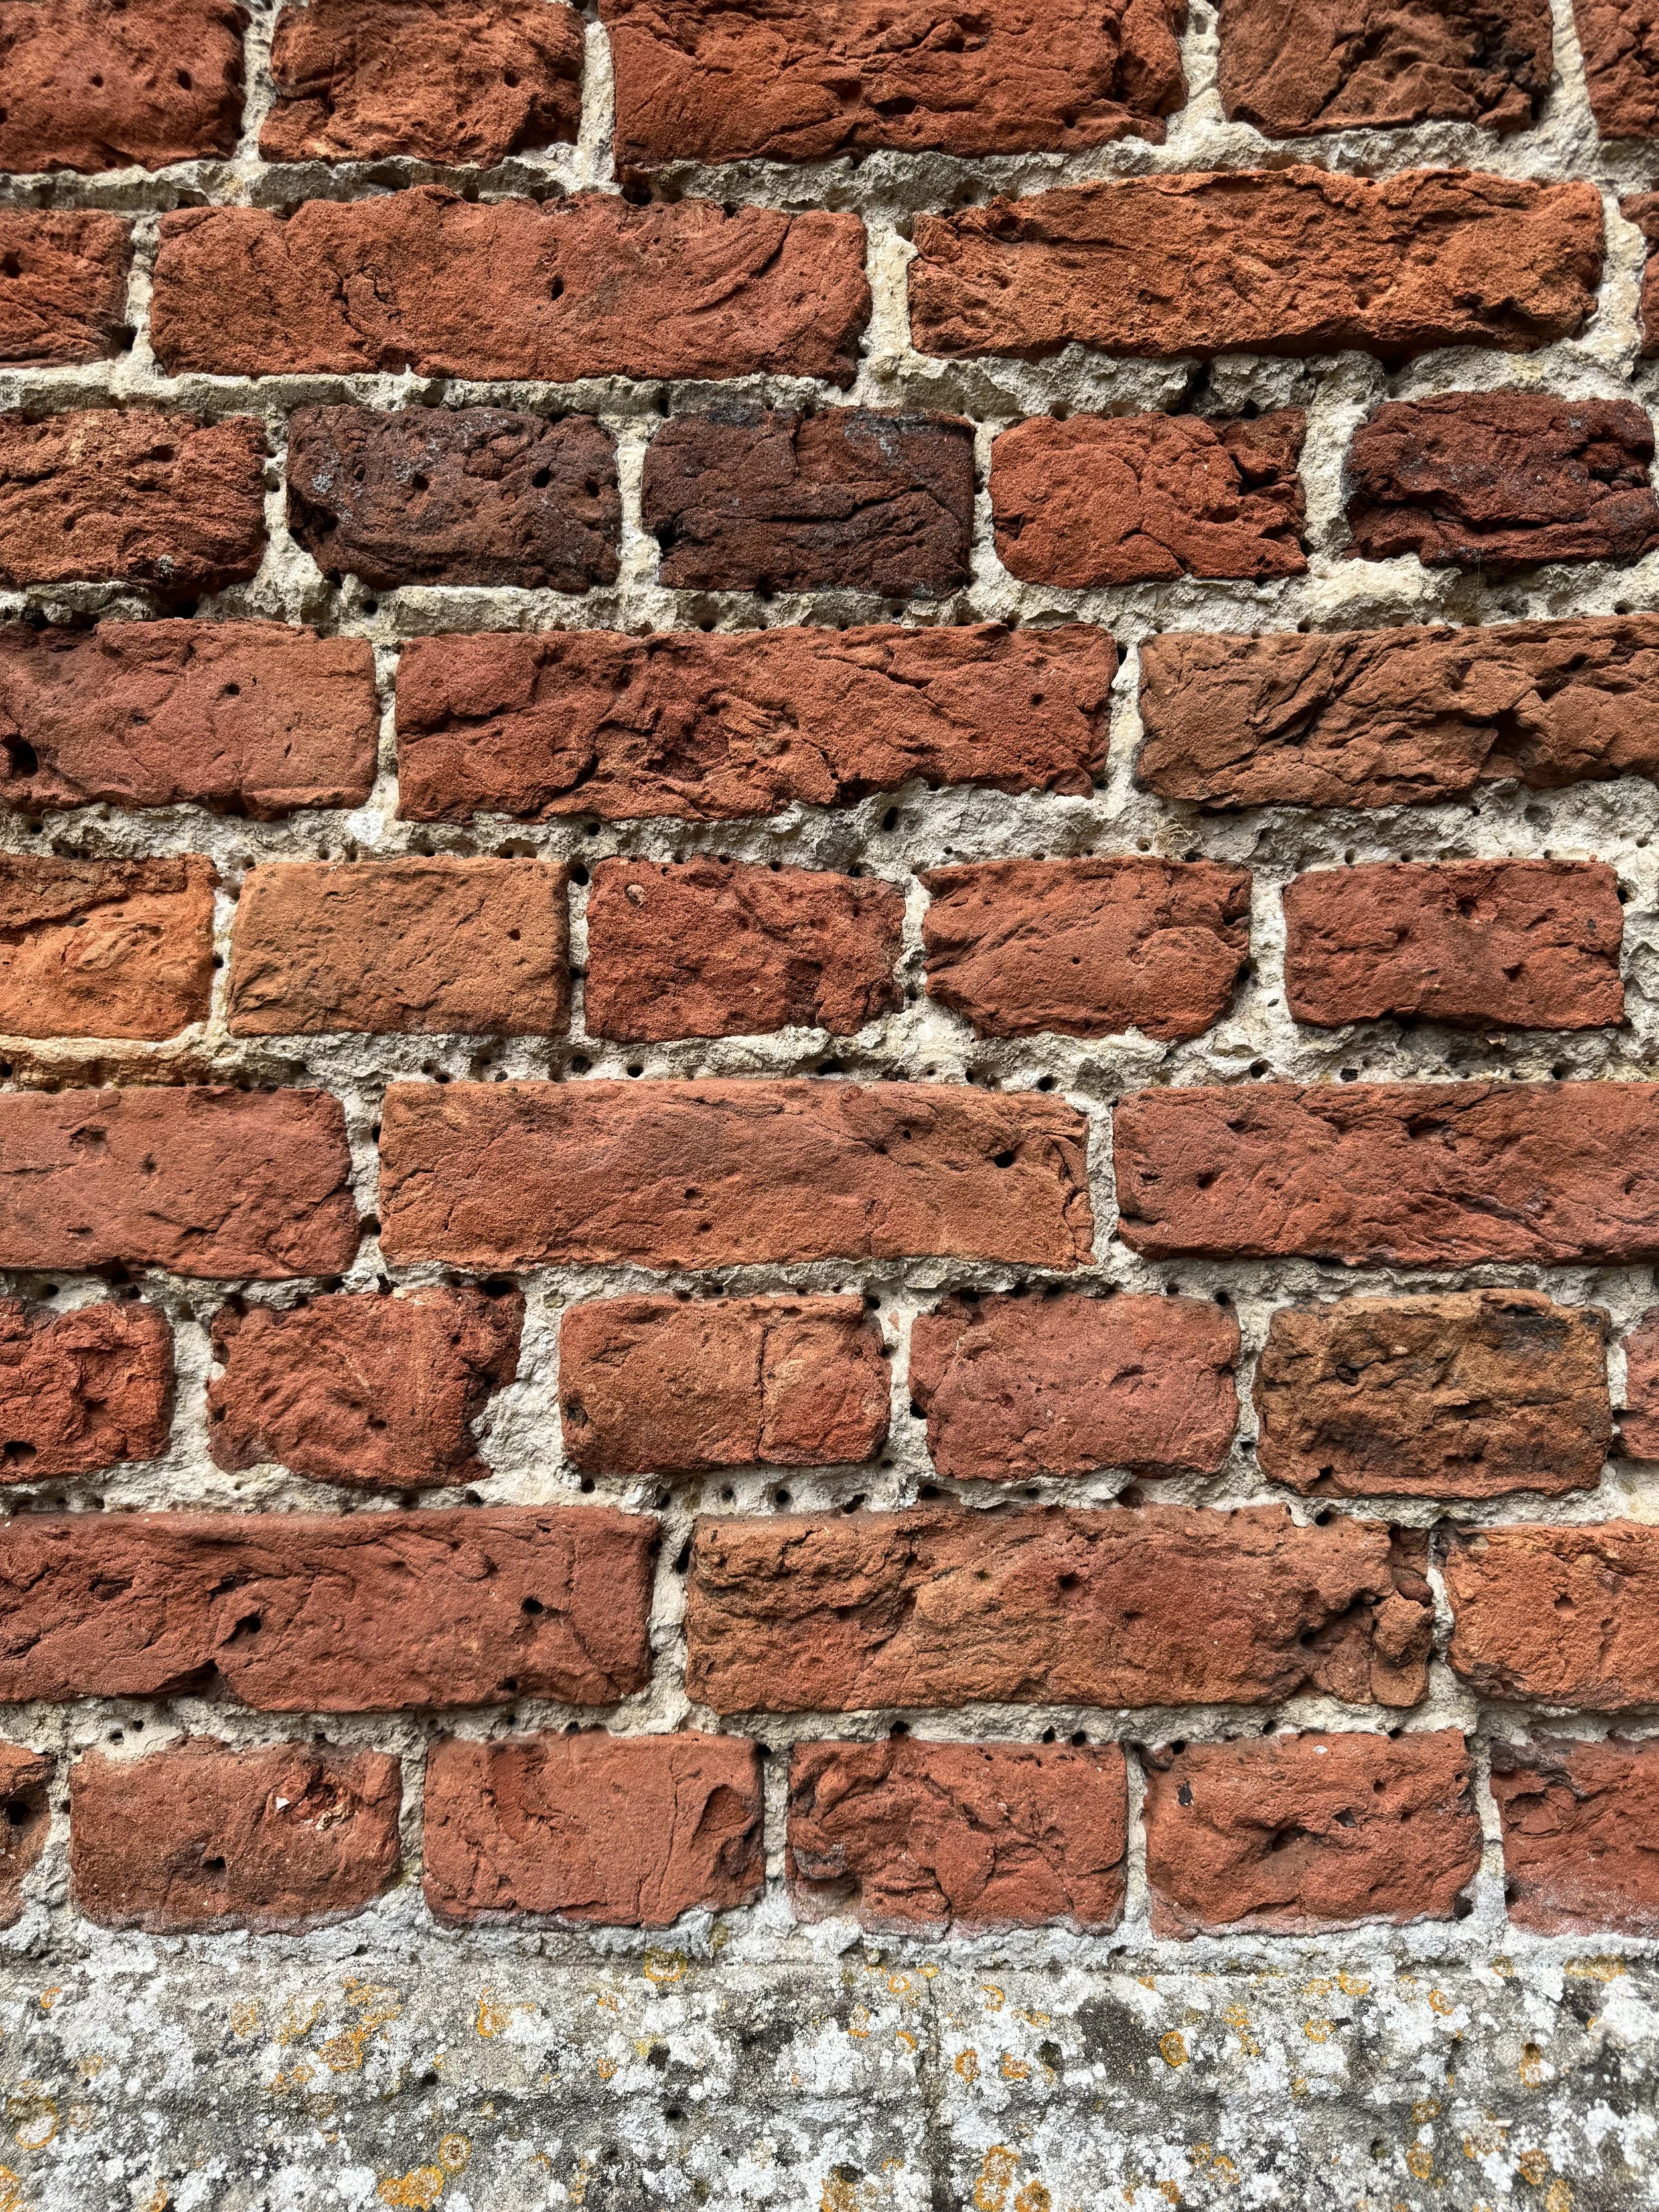
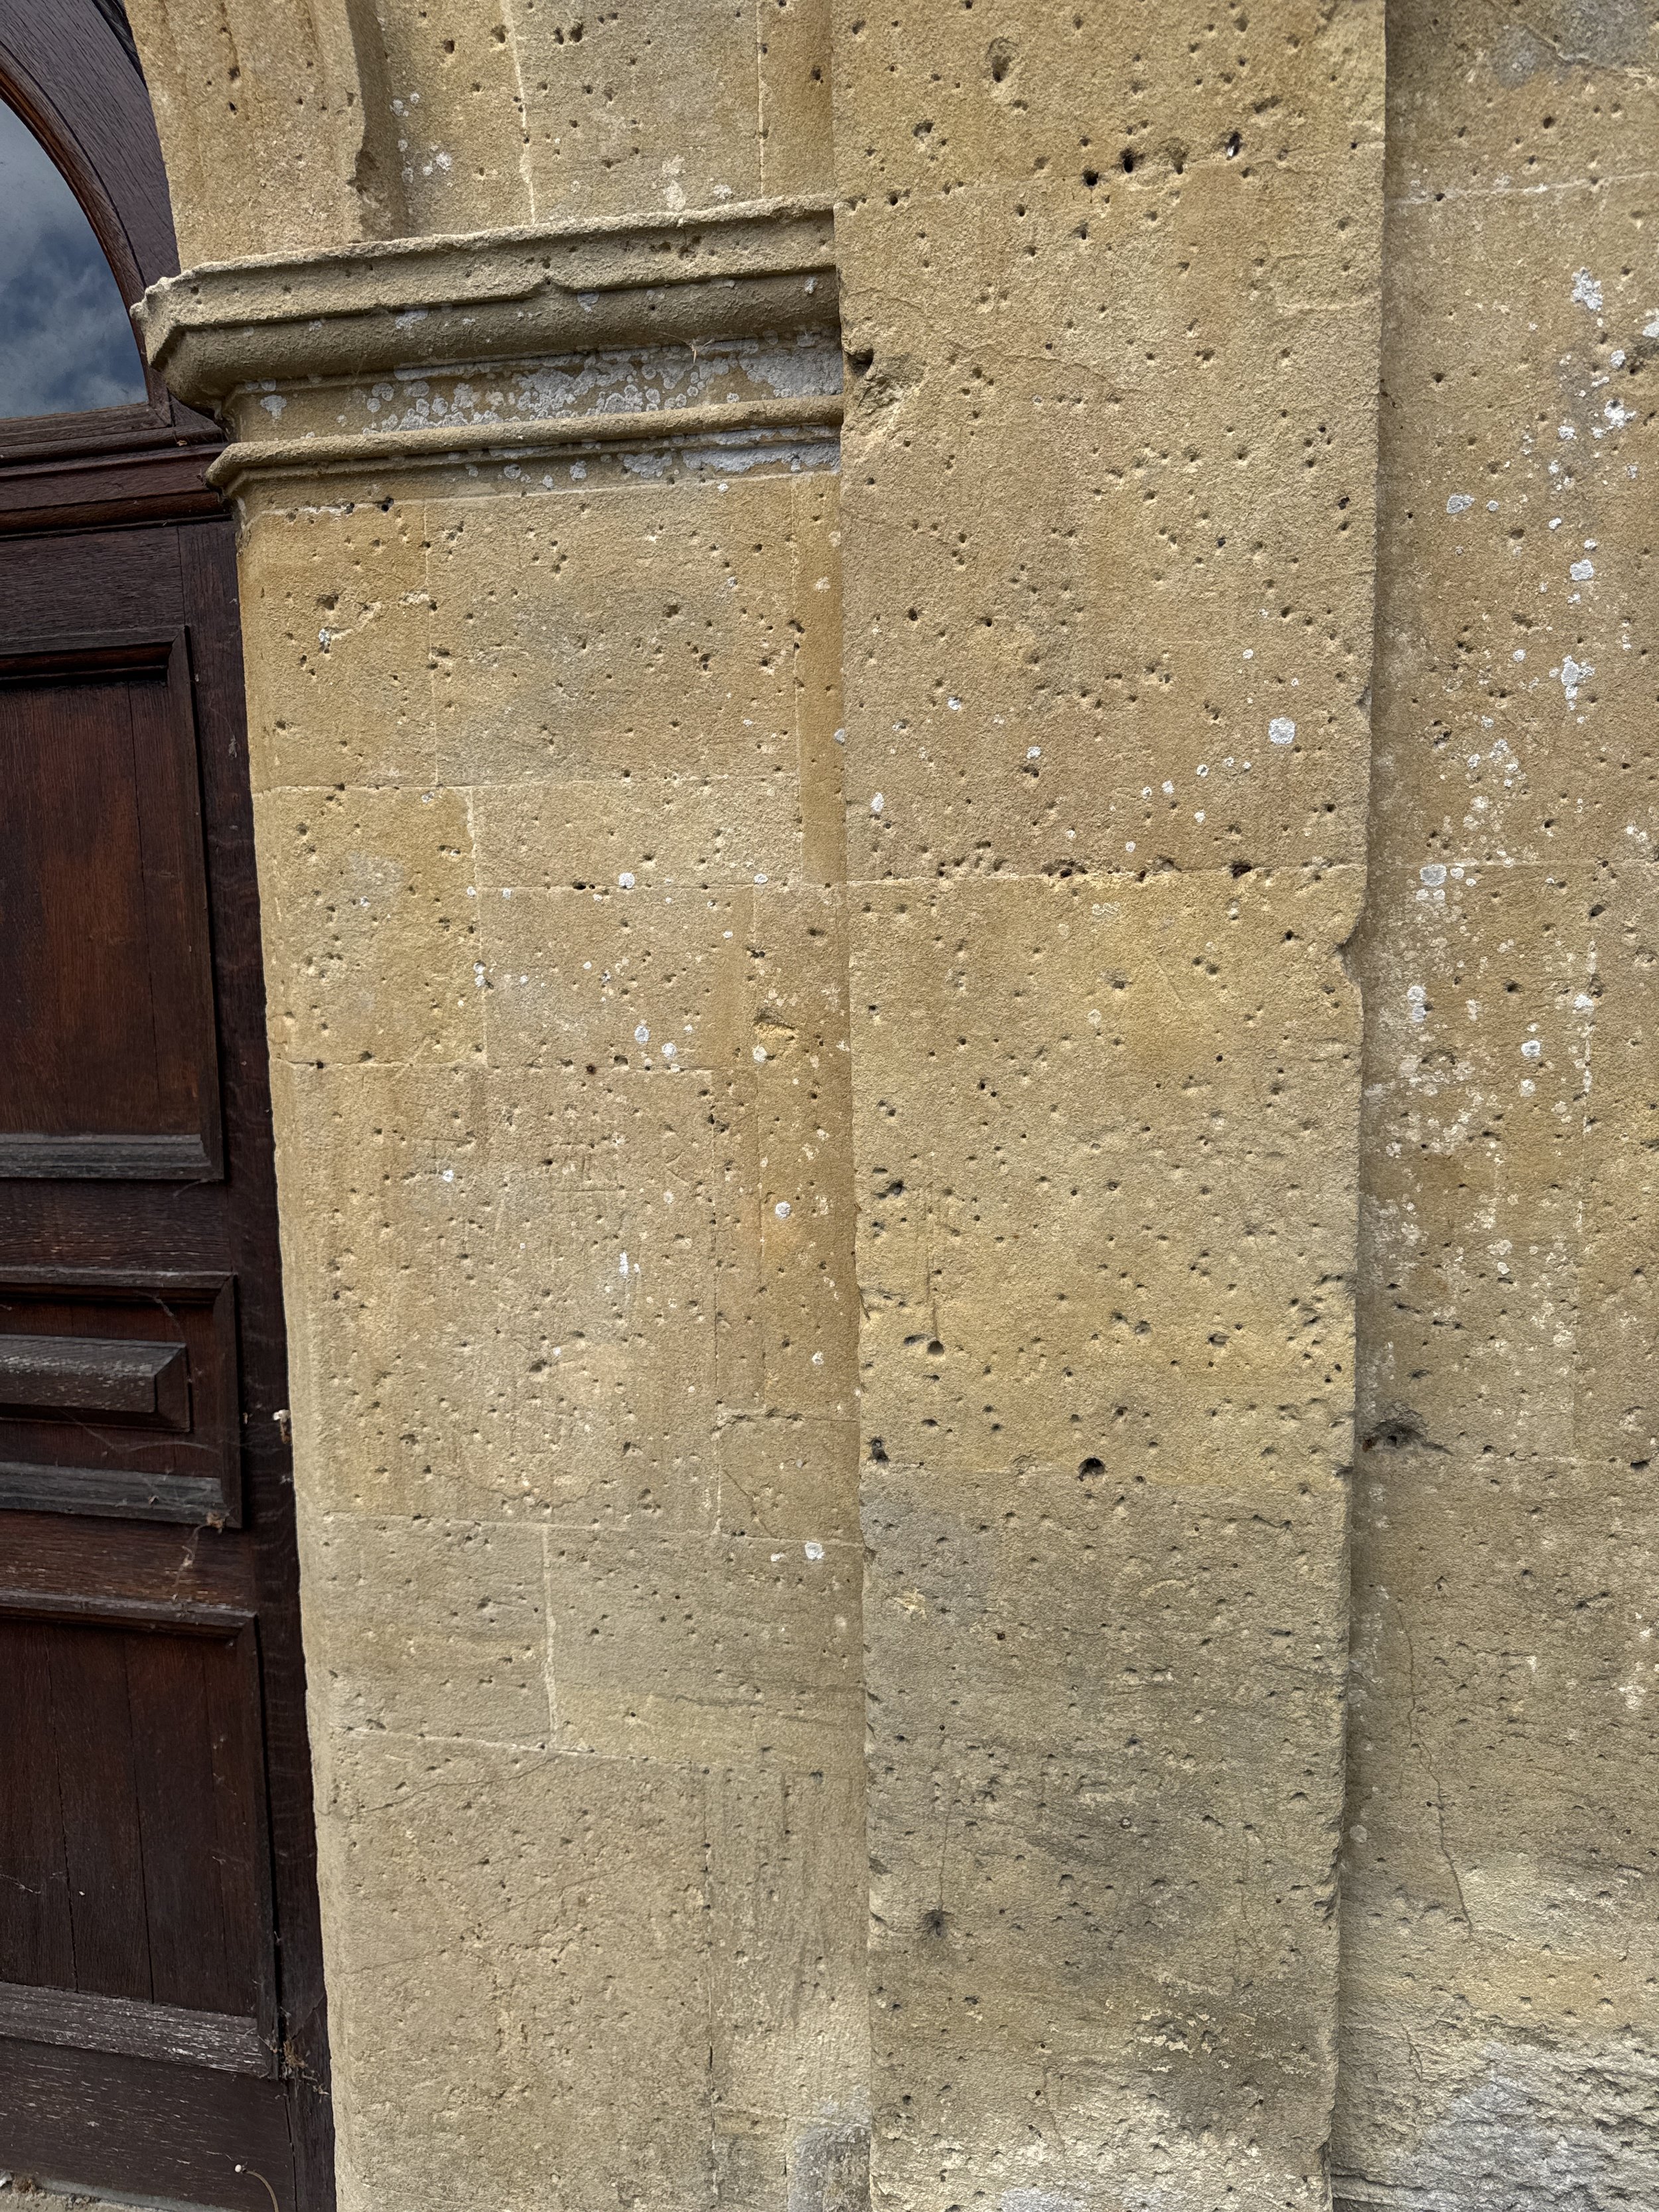
Masonry bees, also called mortar bees, are solitary bees that excavate small nesting tunnels in soft, weathered lime mortar joints and in soft or already-eroded brick faces. The important point for a surveyor is that they exploit material that has already gone soft or perished, rather than attacking sound, hard masonry. Their presence is as much a symptom as a cause.
What to look for on a wall.
Small, neat, round holes roughly six to ten millimetres across in the mortar joints or in soft brick.
Small piles or scatterings of fine mortar dust, the spoil from the tunnelling, on ledges and at the base of the wall below the holes.
Bee activity around the holes in spring and early summer.
Why it matters: The bees flag that the mortar has gone open and soft, which is the same condition that lets water in. Their tunnelling then enlarges the joints, accelerates erosion and increases water ingress, which loops straight back into all the moisture and decay problems above. Shaw House, with its 1581 soft-fired brick and lime mortar, is close to an ideal host
The management answer is the same disciplined lime approach already covered, raking out and repointing with an appropriately specified, breathable, not-too-hard lime mortar, timed for when the bees are inactive. It is also worth holding in mind that these bees are valuable pollinators and generally cause limited structural harm, so the sensible response is repair of the underlying soft mortar rather than reaching for insecticide. Seeing the evidence in the flesh on a real Elizabethan elevation made the whole soft-brick and lime story land far better than any diagram would have.